Tools Needed:
Screwdriver kit – Pentalobe, Phillips, Y-type, Standoff
Suction cup
Hard plastic plectrum
Tweezers
Spudger
Hot air gun
New iPhone 11 Pro frame adhesive tape
Step 1: Tear down the iPhone 11 Pro and remove the display screen
1.1 Turn off the iPhone and loosen the two pentalobe screws on the bottom.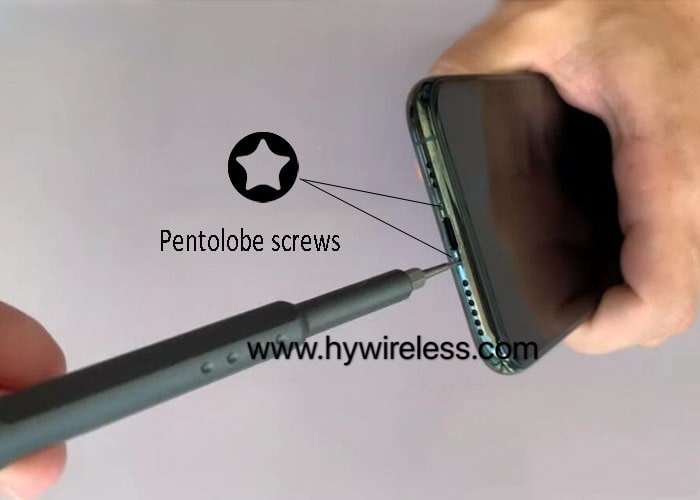
1.2 Heat the back cover edge in 80 ℃ hot air gun blowing for 2 minutes.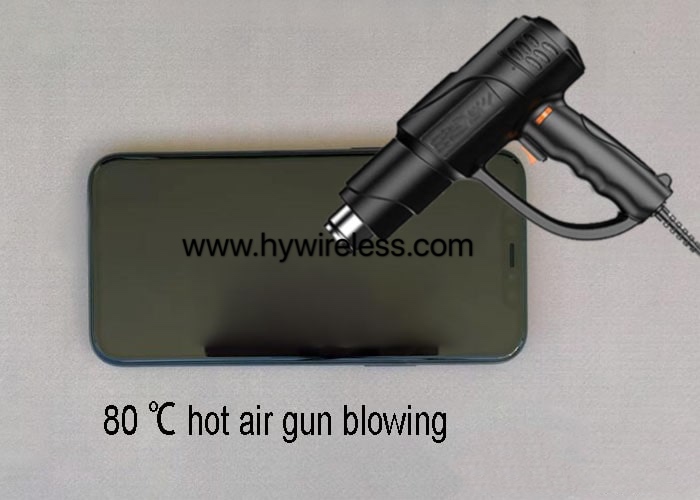
1.3 Use a suction cup to pull the display screen and make a small gap. Use Hard plastic plectrum to insert the gap and slice around. Separate the iPhone 11 Pro display screen from the phone slowly by prying up. Clear out the black adhesive glue. 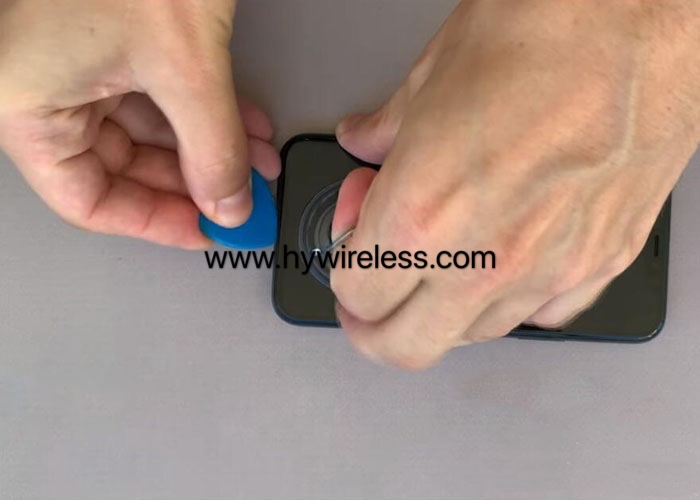
1.4 Hold the iPhone 11 Pro display screen and digitizer assembly with frame on a box or something, remove the two Y-type screws and remove the small metal panel with tweezers.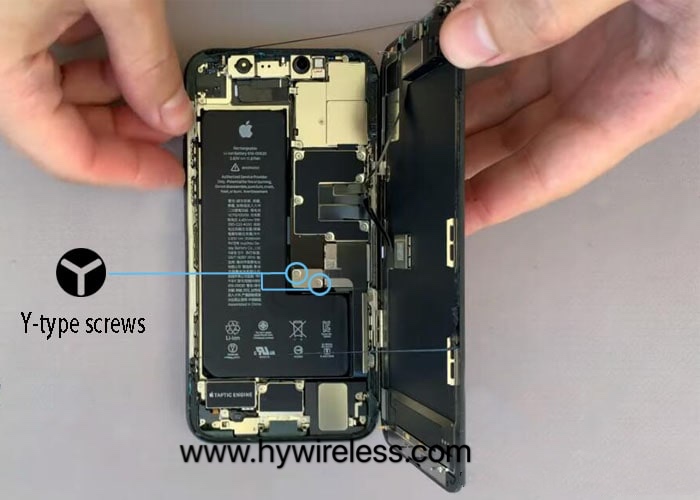
1.5 Loosen the six Y-type screws and take out the large metal panel.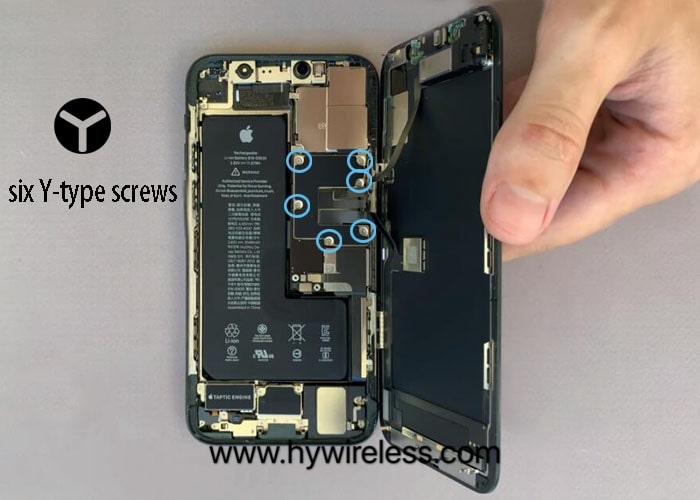
1.6 Pry and disconnect the battery flex cable, then the display cables with a spudger. Remove the display screen after the flex cables are disconnected.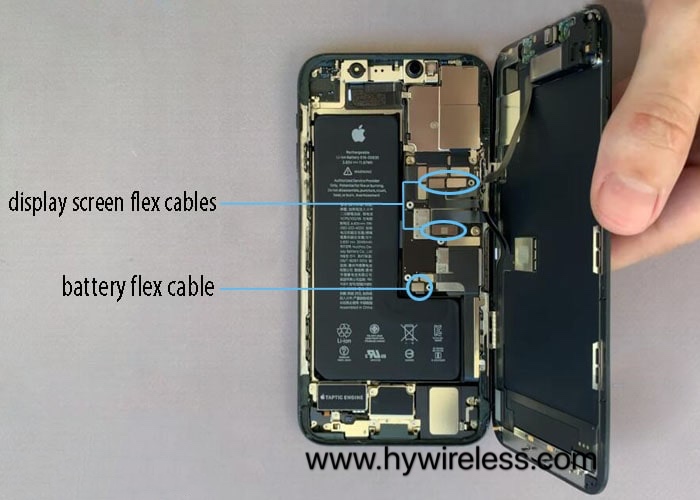
Step 2: Replace the iPhone 11 Pro speaker
2.1 Loosen the four Y-type screws and remove the metal panel.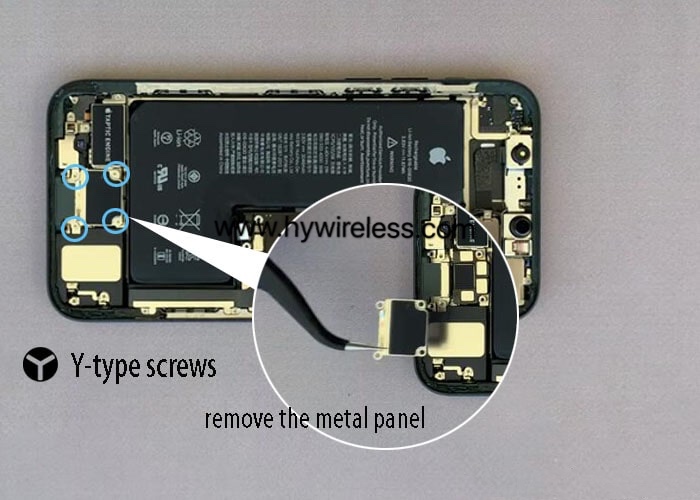
2.2 Pry and disconnect the second battery flex cable and the speaker flex cable after the metal panel is removed.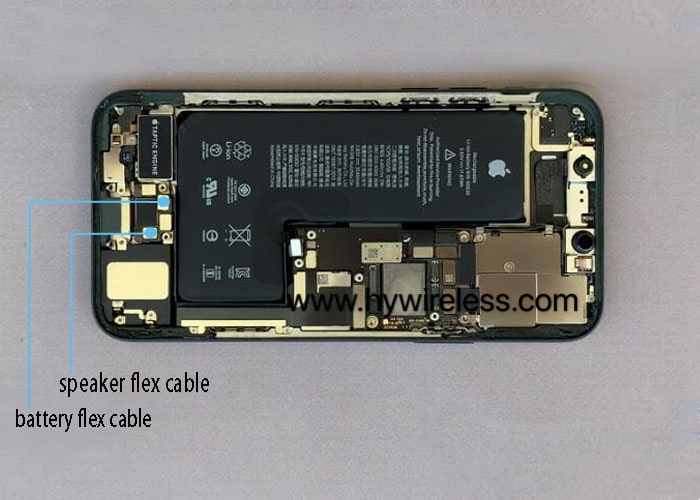
2.3 Remove the two Phillips screws and one standoff screw for fixing the speaker.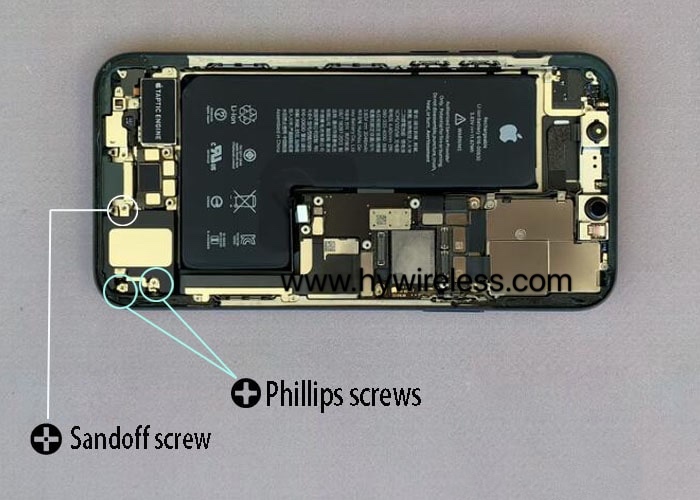
2.4 Use 80 ℃ hot air gun blowing the speaker to heat up the black glue adhesive for easy removing, then gently remove the speaker with tweezers.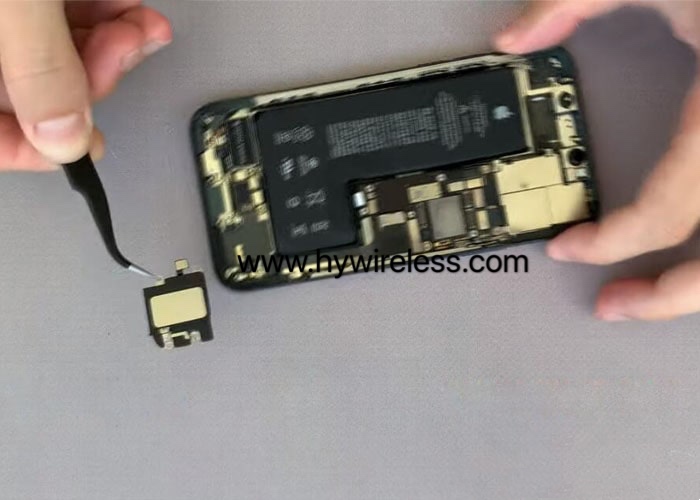
2.5 Install the new speaker in the phone and screw the three screws backing for fixing it.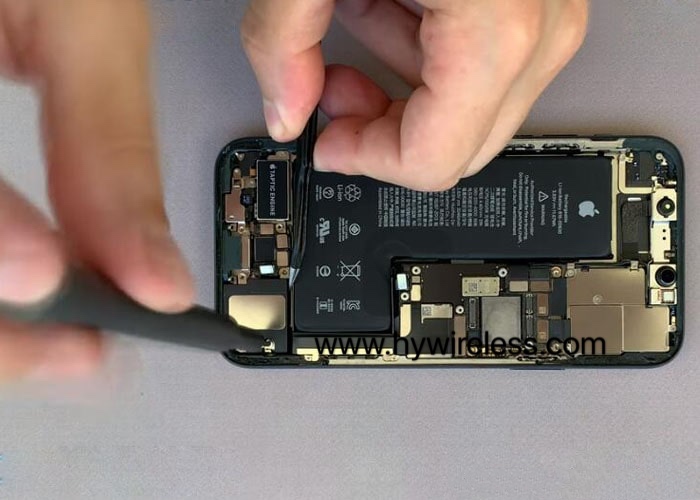
Step 3: Reassemble the iPhone 11 Pro
3.1 Connect the battery cable and the speaker cable, install the metal panel back and fasten the four Y-type screws for fixing it.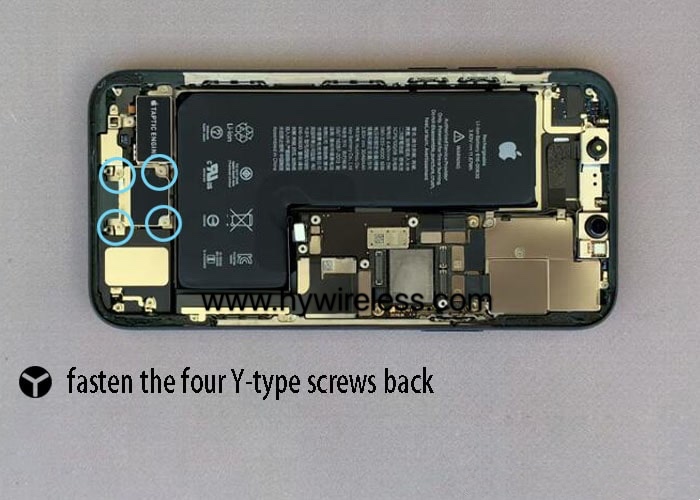
3.2 Connect the display screen cable to the phone and battery cable as well. Turn on the iPhone and test the iPhone. Check the functions of each application. Make sure they are all ok.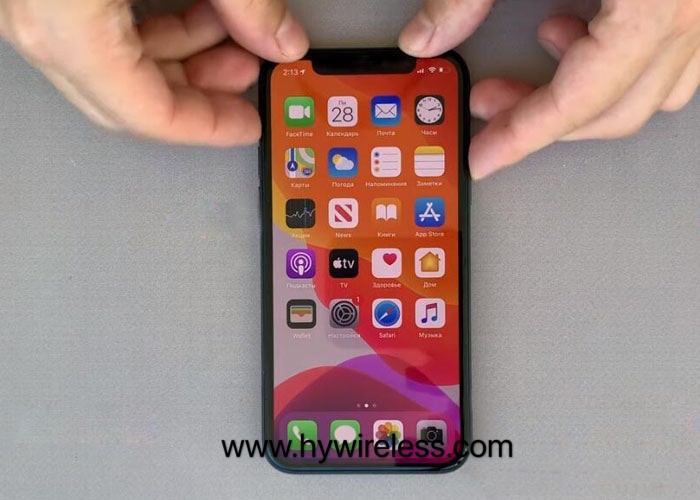
3.3 Turn off the phone again, disconnect the display cables and the battery cable. Remove the display. Clear out the black adhesive glue with tweezers.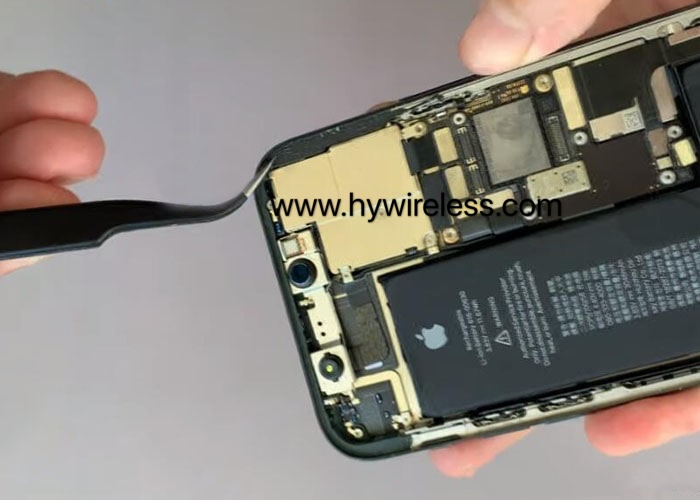
3.4 Attached a new frame adhesive tape on the frame edge. Operating procedure refers to our previous tutorial on How to Replace iPhone 11 Pro Rear-facing Camera. 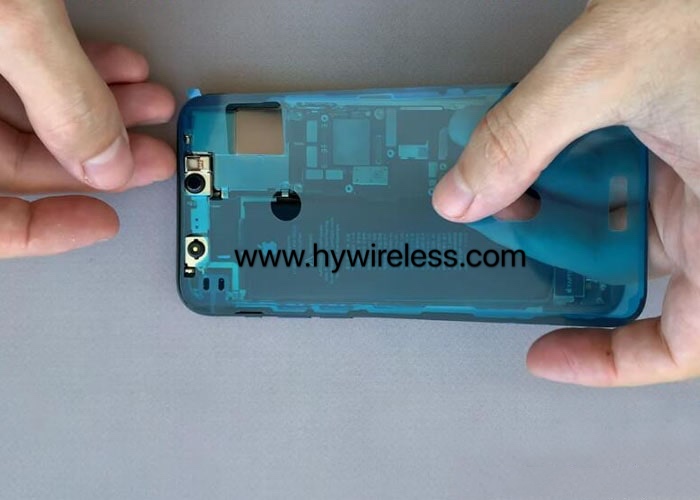
3.5 Install and connect the display screen cable and the battery cable. Place the metal panel and fasten the six Y-type screws fixing the flex cables. Place the small metal panel back and fasten the two Y-type screws back.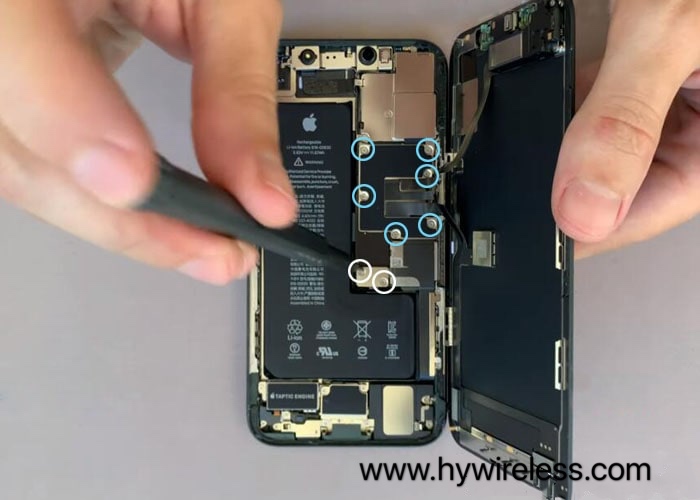
3.6 Assemble the display screen on the phone and gently press the edge to make sure it is no gap left on the edge. Fasten the two pentalobe screws on the bottom. All process is done.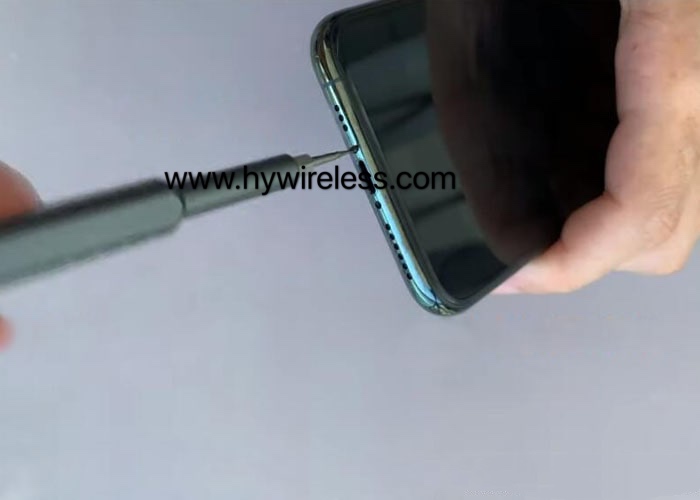
Notes: the whole operating procedure above is under the hands of our professional repair team. We do not suggest you tear down and replace the parts of the iPhone 11 Pro at home if you are unfamiliar with iPhone repair. The display screen some replacement parts for iPhone 11 Pro are easy to be broken, which requires our patience and insistence. Questions about iPhone 11 Pro speaker repair will be answered as long as you leave it on the comments below.

 Service
 阿里旺旺
阿里旺旺 MSN
MSN